Movable Type 3 の頃から、Movable Typeを利用した開発の仕事をしていますが、正直なところ、リッチテキストエディタの機能は未だによくわかっていません。
サードパーティーのリッチテキストエディタ(TinyMCEなど)をMovable Typeに組み込んでいるため、公式ドキュメントの内容をそのまま適用しても思い通りに動作しない。これがわかりづらさを増していました。
しかし最近、標準のリッチテキストエディタがMTRichTextEditorに変更され、公式(?)のドキュメントも公開されたことで(https://movabletype.github.io/mt-rich-text-editor/developer-guide/)、だいぶとっつきやすくなりました。
Movable Type 8からはMTBlockEditorが実装されたこともあり、リッチテキストエディタにはあまり注力しなくなっていましたが、最近、Movable Type 6をバージョンアップする案件がありました。今まで運用してきた「記事」をそのまま残し、これからも同じように運用したいとのリクエストがあったので、久しぶりにリッチテキストエディタに手を加えることに。
テンプレートパーツを挿入できる機能
PowerCMSとMovable Type、どちらの機能だったか曖昧ですが、以前のバージョンでは標準で備わっていた記憶があります。しかし、最近のリッチテキストエディタ(TinyMCE版)には、テンプレートパーツを挿入できる機能がありませんでした。
余談ですが、「テンプレート」という言葉、Web制作の現場では色んなものを指すので非常にわかりづらく、曖昧で危険なワードですね。Movable Typeのテンプレートなのか、記事のひな形なのか、記事に使うパーツ単位なのか......。
対象のウェブサイトには、サイトのデザインガイドラインに従ったパーツ(テンプレート)の配置ルールがあり、それ用のHTMLソースコードも決まっています。
それらはHTMLソースコードを直接書かない限り、リッチテキストエディタで入力できるようなHTMLコードではないため、簡単に入力できる機能が必要になります。
MTRichTextEditor プラグインのカスタマイズ
Movable Type 標準に含まれている、MTRichTextEditor のプラグインに手を加えます。 最終的な完成形は下記です。
mt/plugins/MTRichTextEditor/
├── config.yaml(editors セクションを追記)
└── tmpl/
    └── extension.tmpl(新規作成)
config.yaml を編集
https://movabletype.github.io/mt-rich-text-editor/developer-guide/mt-plugin
こちらのページを参考に、editors: セクションに extension: extension.tmpl の記述を追記します。 (138行目あたりです。Movable Type 9.0.5 時点)
config.yaml
editors:
  mt_source_editor: {}
  mt_rich_text_editor:
    label: MTRichTextEditor
    template: mt_rich_text_editor.tmpl
    toolbar_items:
      - bold
      - italic
      - underline
      - strike
      - blockquote
      - bulletList
      - orderedList
      - horizontalRule
      - link
      - unlink
      - insertHtml
      - file
      - image
      - table
      - source
      - undo
      - redo
      - foregroundColor
      - backgroundColor
      - removeFormat
      - alignLeft
      - alignCenter
      - alignRight
      - indent
      - outdent
      - block
      - fullScreen
      - structure
    extension: extension.tmpl  # ← この行を追加
applications:
  cms:
    menus:
      settings::mt_rich_text_editor:
        label: MTRichTextEditor
extension.tmpl を作成
config.yaml と同じ階層に、tmpl ディレクトリを作成し、extension.tmpl を作成します。 extension.tmpl は下記の内容にします。
extension.tmpl
<mt:setvarblock name="js_include" append="1">
<script type="module">
  // テンプレートの定義
  const templates = [
    {
      title: 'お知らせ',
      content: '<h3>【お知らせ】タイトル</h3><p>ここに本文を入力してください。</p>'
    },
    {
      title: '注意事項',
      content: '<div style="background:#fff3cd;padding:1em;border-radius:4px;"><strong>⚠ ご注意</strong><p>注意内容をここに入力してください。</p></div>'
    },
    {
      title: '問い合わせ',
      content: '<h3>お問い合わせ</h3><p>ご不明な点がございましたら、下記までお問い合わせください。</p><p>TEL: 000-0000-0000<br>Email: info@example.com</p>'
    }
  ];
  // ToolbarItemElement を取得
  const ToolbarItemElement = MTRichTextEditor.Component.ToolbarItemElement;
  // テンプレートドロップダウンのカスタム要素を定義
  customElements.define(
    "mt-rich-text-editor-toolbar-item-template",
    class extends ToolbarItemElement {
      constructor() {
        super();
        // コンテナ
        const container = document.createElement("div");
        container.style.cssText = "position: relative; display: inline-block;";
        // ドロップダウンボタン
        const button = document.createElement("button");
        button.type = "button";
        button.title = "テンプレートを挿入";
        button.innerHTML = 'テンプレート <span style="font-size:10px;">▼</span>';
        button.style.cssText = "padding: 4px 8px; cursor: pointer; background: none; border: none; font-size: 14px;";
        // ドロップダウンメニュー
        const menu = document.createElement("div");
        menu.style.cssText = "display: none; position: absolute; top: 100%; left: 0; z-index: 10000; background: #fff; border: 1px solid #ccc; border-radius: 4px; box-shadow: 0 2px 8px rgba(0,0,0,0.15); min-width: 150px;";
        // メニュー項目を作成
        templates.forEach((tmpl) => {
          const item = document.createElement("div");
          item.textContent = tmpl.title;
          item.style.cssText = "padding: 8px 12px; cursor: pointer;";
          item.addEventListener("mouseenter", () => {
            item.style.backgroundColor = "#e3f2fd";
          });
          item.addEventListener("mouseleave", () => {
            item.style.backgroundColor = "";
          });
          item.addEventListener("click", (e) => {
            e.preventDefault();
            e.stopPropagation();
            this.tiptap?.commands.insertContent(tmpl.content);
            menu.style.display = "none";
          });
          menu.appendChild(item);
        });
        // ボタンクリックでメニュー表示切り替え
        button.addEventListener("click", (e) => {
          e.preventDefault();
          e.stopPropagation();
          menu.style.display = menu.style.display === "none" ? "block" : "none";
        });
        // 外部クリックでメニューを閉じる
        document.addEventListener("click", (e) => {
          if (!container.contains(e.target)) {
            menu.style.display = "none";
          }
        });
        container.appendChild(button);
        container.appendChild(menu);
        this.shadowRoot.appendChild(container);
      }
    }
  );
  // ツールバーにテンプレートアイテムを追加
  MTRichTextEditor.on("create", (options) => {
    options.toolbar = [
      [
        // 左側
        [
          ["block"],
          ["bold", "italic", "underline", "strike"],
          ["link", "unlink"],
          ["template", "insertHtml", "file", "image"],
        ],
        // 右側
        [
          ["undo", "redo"],
          ["source", "fullScreen"],
        ],
      ],
    ];
  });
</script>
</mt:setvarblock>
冒頭の const templates = [ ... ] の部分に、挿入したいテンプレートパーツの名称とHTMLコードを記載します。
後半の MTRichTextEditor.on("create", (options) => { ... } の部分は、表示されるツールバーの設定です。各自お好みに応じて調整してください。
表示設定の仕方は下記を参照してください。 https://movabletype.github.io/mt-rich-text-editor/developer-guide/toolbar-item-element
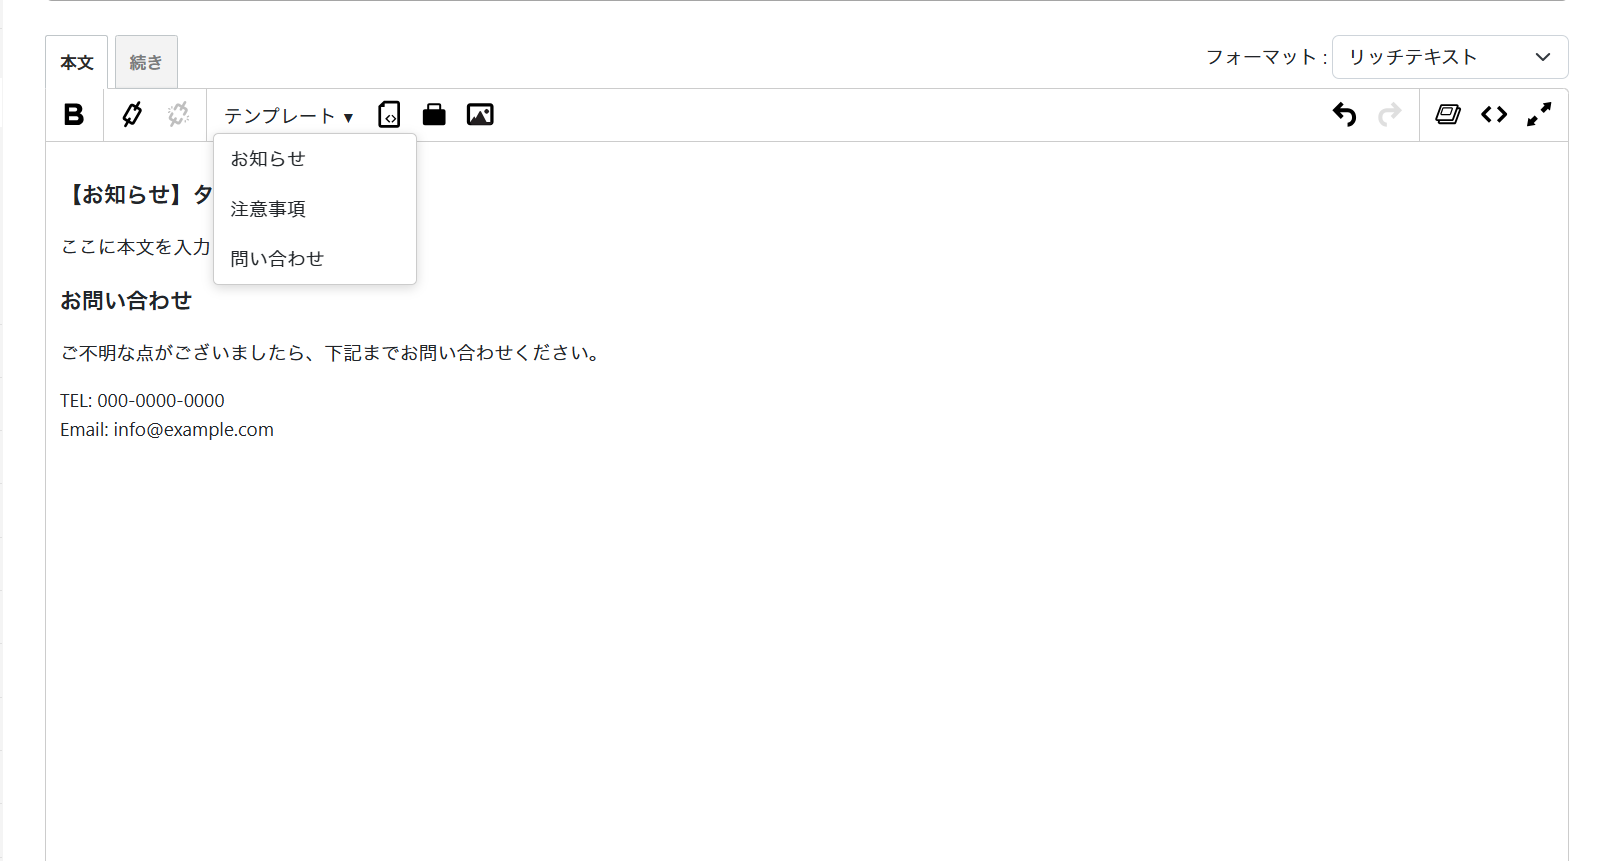
リッチテキストエディタ
上記を反映すると、下記のような形で、テンプレートパーツを挿入できます。